Okay, let’s be real for a second who doesn’t swoon over a thick, creamy cheesecake?
Fun fact: The first cheesecake recipe was recorded way back in ancient Greece! Yep, they were basically the OG dessert kings.
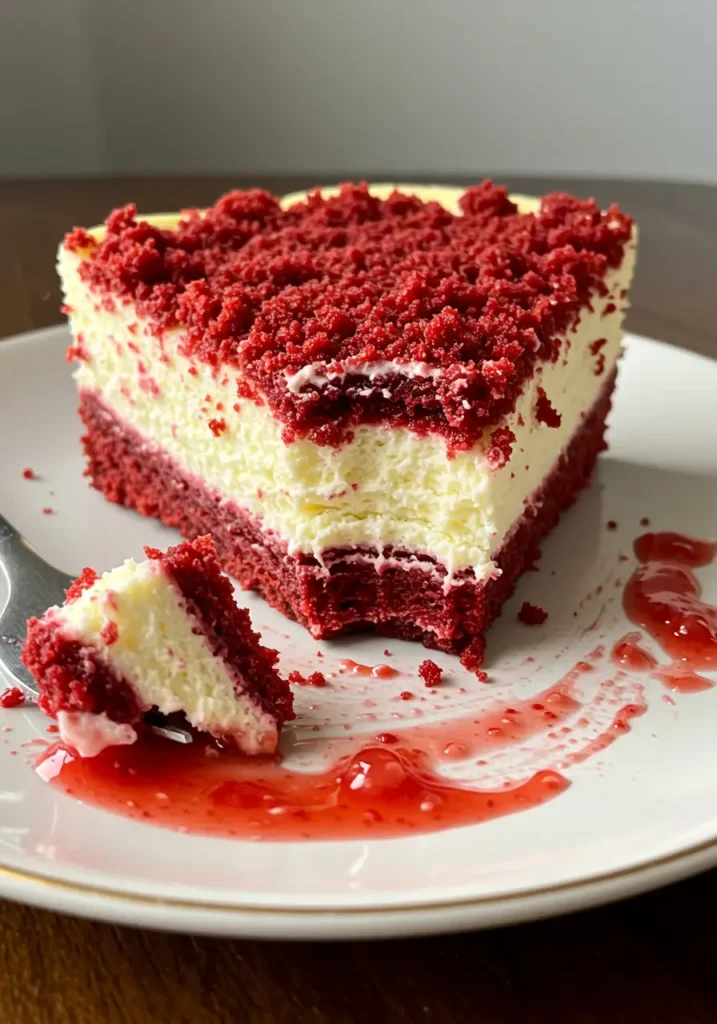
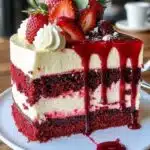
Fast forward to today, and we’ve gone full fancy with combos like this Red Velvet Strawberry Cheesecake. It’s like love at first bite, no joke. Rich cocoa flavors, tangy cream cheese, and that juicy strawberry goodness… it’s everything you didn’t know you needed!

I gotta tell you the first time I tried baking one, I majorly messed up. I thought I could eyeball the ingredients (spoiler: don’t do that), and ended up with a cracked top so bad, it looked like a tiny earthquake hit it. But hey, trial and error makes the victory sweeter, right?
In this guide, I’m spilling all the secrets. You’ll get my battle-tested tips, common traps to avoid, and even some fun twists if you’re feeling a little wild. Let’s bake something legendary, my friend!
What Makes Red Velvet Strawberry Cheesecake So Irresistible?
You know how some desserts just hit different? This is one of those.
Let me break it down real quick:
First off, the red velvet base isn’t just about the color (even though that deep red totally gives it those heart-eyes vibes). It’s got a subtle cocoa flavor that’s rich but not too overpowering like, that perfect “hmm what’s that?” moment in every bite.
Then boom you hit the cheesecake layer. Smooth. Creamy. A little tangy thanks to that dreamy cream cheese frosting vibe. It’s basically a hug for your taste buds.
And don’t even get me started on the fresh strawberry topping! That pop of bright, juicy sweetness cuts through all the richness and keeps every forkful feeling light and fresh. I like to think of it as the plot twist that makes the whole story unforgettable.
Not to sound dramatic, but honestly, once you’ve had a slice of this layered beauty, regular ol’ cheesecake kinda feels like it’s missing something. This dessert nails that perfect balance of decadent and refreshing which, let’s be real, is crazy hard to pull off sometimes!
When I made it for a family BBQ last summer, folks didn’t even wait for it to finish cooling properly. They attacked it straight outta the fridge and not a crumb was left behind. Not one!
Moral of the story? Red Velvet Strawberry Cheesecake = instant crowd-pleaser, no fancy chef skills needed.
Key Ingredients You’ll Need (And a Few Pro Tips!)
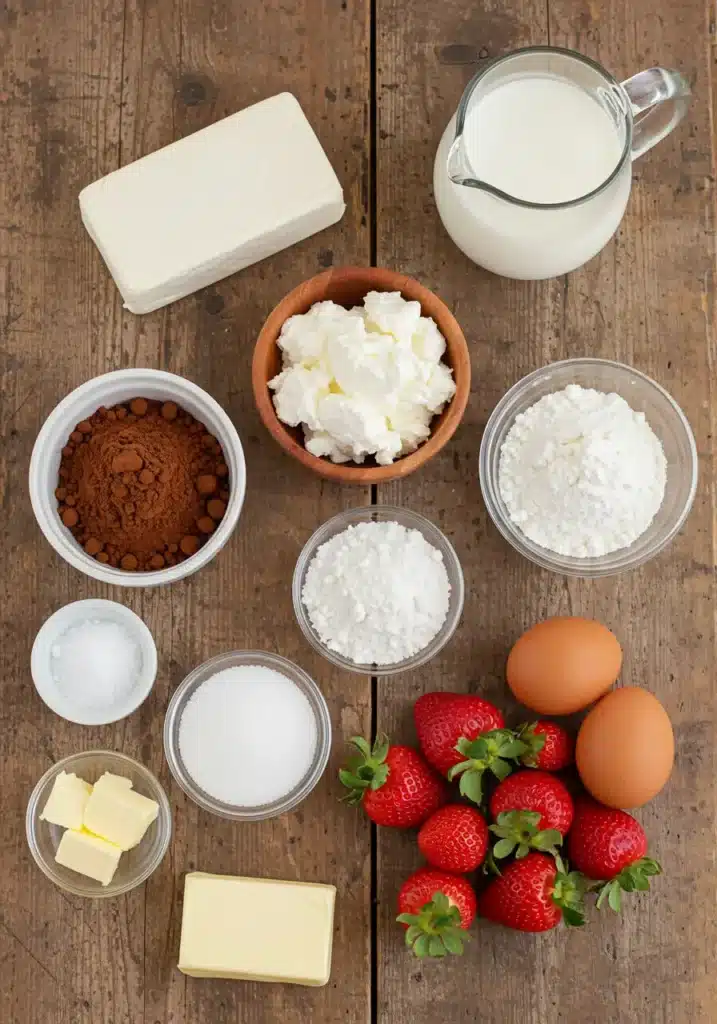
Alright, here’s the deal. Don’t just toss random stuff into your bowl and hope for magic (learned that the hard way). Quality ingredients make all the difference here. Here’s what you’ll need:
For the Red Velvet Cake Base:
- All-purpose flour – Go for unbleached if you can. It bakes up a little softer.
- Cocoa powder – Just a touch for that classic red velvet hint.
- Buttermilk – Not optional! It gives that signature tender crumb. (P.S. If you’re out, mix milk with a splash of vinegar.)
- Granulated sugar – Regular white sugar does the trick.
- Vegetable oil – Way better than butter for keeping it moist.
- Eggs – Room temp, always. Trust me, it blends so much better.
- Vanilla extract – Real stuff, not the fake junk.
- White vinegar – Tiny splash for the chemical magic.
- Red food coloring – Gel works better than liquid the color pops more!
For the Cheesecake Layer:
- Cream cheese – Full fat. Don’t even think about low-fat, it’s not the same.
- Granulated sugar – Sweet, but not too sweet.
- Eggs – Again, room temp, folks.
- Sour cream – Adds extra creaminess and that little tangy zing.
For the Strawberry Topping:
- Fresh strawberries – Go ripe, but not mushy.
- Sugar – Just enough to sweeten up the berries.
- Lemon juice – Brightens everything up.
- Cornstarch – For thickening that glossy strawberry sauce.
Step-by-Step Guide to Making Red Velvet Strawberry Cheesecake
Alright, I’ll be real with you the first time I tried this, I seriously overcomplicated things. Good news? It’s way easier than it looks if you just follow the steps. Let’s break it down:
1. Prep Your Stuff
First things first preheat your oven to 325°F (163°C). Grease and line a 9-inch springform pan.
(And hey, don’t skip the parchment paper on the bottom saves you from heartbreaking stickage later.)
Also, set your cream cheese and eggs out to chill at room temp. Cold cream cheese = lumpy batter = major nope.
2. Make the Red Velvet Cake Layer
In one bowl, whisk your flour, cocoa powder, and a lil’ pinch of salt.
In another, mix your oil and sugar until it looks kinda grainy and weird (normal, don’t panic). Beat in the eggs, vanilla, buttermilk, vinegar, and that glorious red food coloring.
Now gently fold the dry into the wet. Don’t over-mix, or you’ll end up with a tough cake base… and trust me, no one wants cheesecake on cardboard.
Pour the batter into your pan and smooth it out like you’re frosting a baby cake.
3. Make the Cheesecake Batter
In a big bowl (I call it my “big dreams” bowl), beat the cream cheese and sugar till super creamy no lumps allowed. Add the eggs, one at a time, mixing just until combined. Stir in the sour cream last.
Pro tip: Don’t beat the heck outta it. Gentle wins here. You want creamy, not whipped.
4. Layer It Up
Carefully pour the cheesecake batter right over your red velvet base. Use a spatula to even it out be sweet, not rough.
Optional but awesome: lightly tap the pan on the counter to bust any sneaky air bubbles.
5. Bake It Slow and Steady
Pop that beauty into the oven. Bake for about 50–60 minutes, but start checking around 50. You’re looking for set edges and a slightly wobbly center.
Turn off the oven, crack the door, and let it sit inside for another hour. This little chill-out session keeps it from cracking like a desert floor.
6. Cool Completely
After its oven nap, move the cheesecake to the fridge. Let it cool for at least 4 hours overnight is even better if you can resist.
7. Make That Strawberry Topping
While your cheesecake is chilling, make a quick sauce. Toss strawberries, sugar, lemon juice, and a spoon of cornstarch into a saucepan.
Heat gently until it’s glossy and syrupy. Let it cool it’ll thicken up into magic.
8. Assemble & Devour
Once the cheesecake is set, pour the strawberry topping all over the top. Pile on some fresh sliced strawberries if you’re feelin’ extra.
Slice, serve, and prepare for everyone to think you’re a baking genius. (You are. Own it.)
Common Mistakes to Avoid When Baking Red Velvet Cheesecake
Okay, real talk baking cheesecake is kinda like babysitting. It’s all about patience and good vibes. Stress baking? Oh yeah, been there. Turns out Harvard Health says baking can actually be a legit form of stress relief!
Here are some mistakes I’ve made (so you don’t have to):
1. Overmixing the Batter
Listen, if you beat the batter like you’re mad at it, you’re gonna whip in too much air.
Result? A cheesecake that rises, falls, and cracks like crazy.
Be gentle, like you’re folding a letter to your future self.
2. Skipping the Room Temp Rule
I know, waiting is boring. But if your cream cheese and eggs are cold, the batter gets lumpy, and lumps = sadness.
Set ‘em out for like 30 minutes minimum before you even think about mixing.
3. Baking at High Heat
This ain’t a pizza, buddy. Low and slow is the only way. If you crank the heat to hurry it up, you’ll get a dry, rubbery cheesecake that nobody wants to Instagram.
4. Not Using a Water Bath (Optional, But Helpful)
Okay, confession: I hate setting up water baths. It’s messy and annoying.
But dang, does it work for super creamy cheesecake. If you’re feeling fancy, wrap your pan in foil and set it in a bigger pan filled halfway with hot water. Otherwise, just bake low and cool slowly.
5. Cutting Before It’s Fully Chilled
I get it, the temptation is real. But cutting a warm cheesecake is like slicing into pudding.
You gotta chill it for at least 4 hours overnight if you can. (Hide it in the back of the fridge if you have snack thieves in your house like I do.)
Creative Variations: Fun Twists on Red Velvet Strawberry Cheesecake
Alright, here’s the deal once you nail the basic Red Velvet Strawberry Cheesecake, the sky’s the limit, baby! Sometimes I like to get a little wild in the kitchen (and not all experiments have been pretty, lol). Here are a few twists that totally work:
1. Chocolate-Dipped Strawberries on Top
Instead of just piling fresh strawberries, why not dip ’em in melted chocolate first?
I did this once for a Valentine’s Day party, and whoa, people lost their minds. It turns this cheesecake into a next-level fancy dessert without any extra hard work.
2. Oreo Cookie Crust
Swap the classic red velvet cake base for a crushed Oreo crust.
Just blitz a bunch of Oreos (cream filling and all), mix with melted butter, and press it into the bottom. The chocolatey crunch paired with the creamy cheesecake? Unreal.
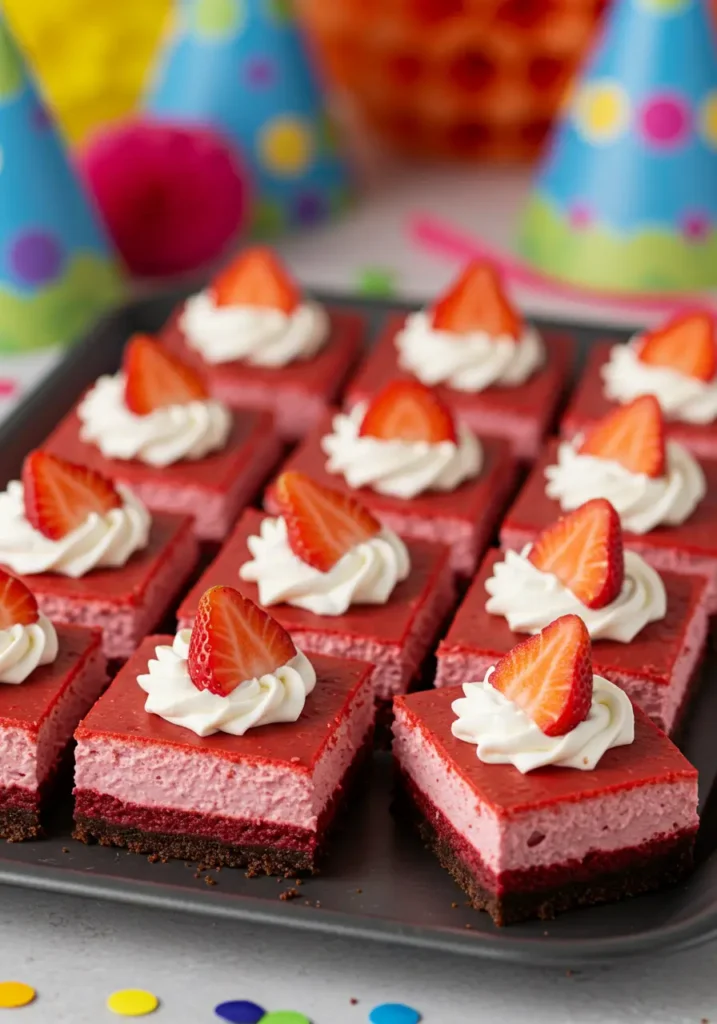
3. Mini Cheesecake Bites
Feeling snacky? Instead of making one big cheesecake, divide everything into cupcake liners and make mini cheesecakes. Perfect for parties when you don’t wanna deal with slicing… or sharing. (Just being honest.)
4. Strawberry Swirl Inside the Cheesecake
Before baking, dollop spoonfuls of strawberry sauce inside the cheesecake batter and swirl it with a knife.
Looks gorgeous, tastes even better. It’s like a secret fruity surprise with every bite.
5. No-Bake Version (for Lazy Summer Days)
Feeling hot and not about that oven life?
Use a no-bake red velvet cookie crust (crushed red velvet cookies + butter) and make a no-bake cheesecake filling with whipped cream folded into the cream cheese. Top with fresh berries, chill, and boom summer dessert done.
Trust me, these variations slap. Pick one and make it your own!
How to Store and Freeze Red Velvet Strawberry Cheesecake
Okay, let’s be real if you even have leftovers, you’re already winning at life.
Here’s how to keep that beauty fresh:
Storing in the Fridge
- Cover the cheesecake loosely with plastic wrap or foil (but don’t press it down on top you’ll mess up your strawberries!).
- Store it in the fridge for up to 5 days.
- Pro tip: Stick a few paper towels under the cheesecake plate to catch any extra strawberry sauce that wants to sneak away.
Freezing for Later
Yup, you can totally freeze it, but it’s better without the strawberry topping if you’re planning ahead.
- Before freezing: Wrap the cheesecake (whole or slices) tightly in plastic wrap, then a layer of foil.
- Freeze for up to 2 months. Longer and it can get kinda funky texture-wise.
- When ready to eat: Thaw overnight in the fridge.
Bonus points if you add fresh strawberry topping after thawing keeps it tasting just-made.
Side note: I once froze a slice for like 3 months by accident (don’t judge me), and honestly? Still pretty dang good with a fresh berry drizzle on top.
Frequently Asked Questions About Red Velvet Strawberry Cheesecake
Alright, let’s knock out some of the biggest burning questions, because if you’re like me, you probably Googled these at 11PM too.
1: Can I use frozen strawberries for the topping?
Totally! Just thaw them first and drain off any extra water, or your sauce will get runny and sad.
2: How do I stop my cheesecake from cracking?
The magic combo: room temp ingredients + gentle mixing + low temp baking + letting it cool slooooow.
(And even if it cracks, no worries strawberries hide everything. #LifeHack)
3: Can I make it gluten-free?
Heck yes! Swap the flour in the red velvet base for a 1:1 gluten-free blend (like Bob’s Red Mill).
The cheesecake part is already gluten-free unless you do a cookie crust.
4: What if I don’t have buttermilk?
Easy fix: Stir 1 tablespoon of vinegar or lemon juice into 1 cup of regular milk. Let it sit for 5 minutes.
Boom. DIY buttermilk.
5: Can I make it ahead for a party?
Absolutely! In fact, cheesecake tastes better when it’s had time to chill.
Make it a day ahead, add your strawberry topping the morning of, and get ready to impress.
Man, if you’re still reading, you’re definitely my kind of people.
Seriously though Red Velvet Strawberry Cheesecake isn’t just a dessert… it’s like a whole vibe.
You’ve got that rich, slightly tangy red velvet cake base, the dreamy, creamy cheesecake center, and then BAM a bright, sweet strawberry topping that basically screams “celebration!” Whether it’s a birthday, a random Tuesday, or you just survived a long week (been there), this cheesecake shows up like the MVP it is.
What I love most? It feels fancy without being impossible.
And even if you mess up a little maybe a small crack here, a slightly crooked strawberry there it still turns out ridiculously good. Like, dangerously good.
Plus, you can totally customize it: Oreo crusts, mini versions, chocolate-dipped toppings… it’s basically begging you to make it yours.
So next time you’re planning a special dessert (or hey, just craving something epic), go ahead and treat yourself to a homemade Red Velvet Strawberry Cheesecake.
Trust me your future self (and everyone lucky enough to snag a slice) will be doing a happy dance.
Now it’s your turn!
Have you ever baked a crazy cheesecake flavor before?
Drop your best cheesecake tips, fails, or flavor ideas in the comments I’d love to hear about ’em!
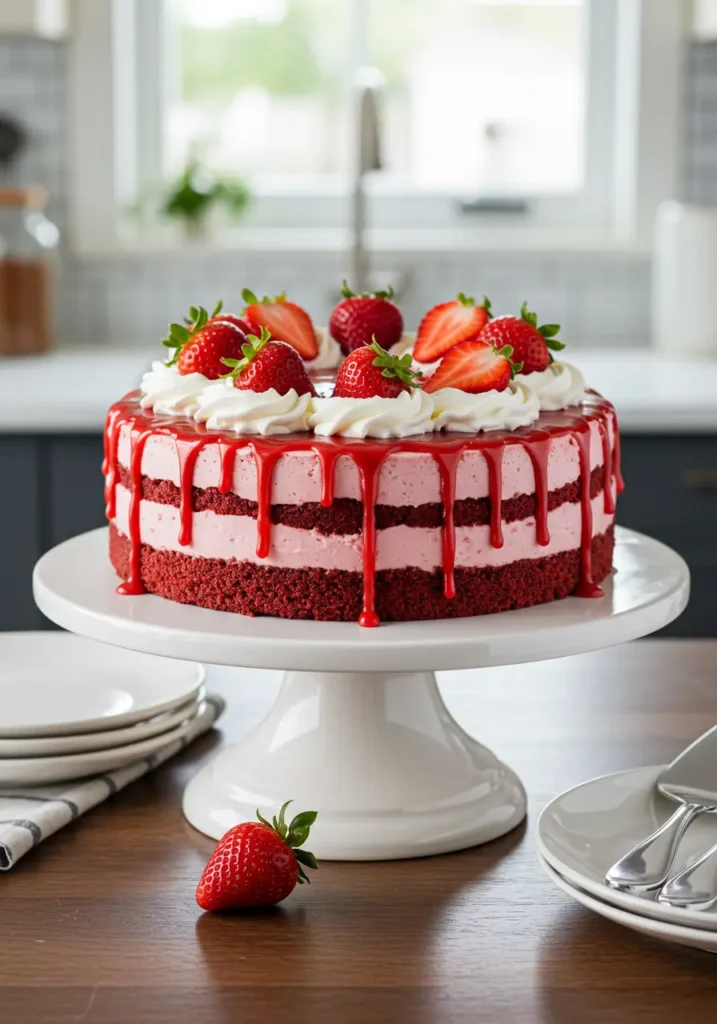
Red Velvet Strawberry Cheesecake Recipe
- Total Time: 1 hour 40 minutes
- Yield: 12 servings 1x
Description
A rich, luscious Red Velvet Strawberry Cheesecake combining moist red velvet cake layers, creamy cheesecake, and juicy fresh strawberries with a vibrant glaze. Perfect for celebrations or anytime you crave something unforgettable!
Ingredients
For the Red Velvet Cake Layers:
- 2 ½ cups all-purpose flour
- 2 tablespoons cocoa powder
- 1 teaspoon baking soda
- ½ teaspoon salt
- 1 cup buttermilk
- 1 tablespoon white vinegar
- 1 teaspoon vanilla extract
- 2 tablespoons red food coloring
- 1 cup unsalted butter, softened
- 1 ½ cups granulated sugar
- 2 large eggs
For the Cheesecake Layer:
- 16 oz cream cheese, softened
- ½ cup granulated sugar
- 2 large eggs
- ½ teaspoon vanilla extract
For the Strawberry Topping:
- 2 cups fresh strawberries, sliced
- ½ cup strawberry preserves or jam
- 2 tablespoons water
For Garnish:
- Whipped cream
- Whole strawberries
Instructions
- Preheat oven to 350°F (175°C). Grease and line two 8-inch round cake pans.
- Make the cake layers: In a bowl, whisk flour, cocoa powder, baking soda, and salt. In another bowl, mix buttermilk, vinegar, vanilla, and food coloring.
- Cream butter and sugar until fluffy. Add eggs one at a time. Alternate adding dry ingredients and buttermilk mixture, beginning and ending with dry. Mix until smooth.
- Divide batter evenly into pans. Bake for 25–30 minutes. Cool completely.
- Make the cheesecake: Beat cream cheese and sugar until smooth. Add eggs one at a time, then vanilla. Pour into a springform pan lined with parchment paper.
- Bake at 325°F (160°C) for 35–40 minutes, until center is set. Cool completely.
- Assemble: Place one cake layer, add cheesecake layer, then second cake layer. Top with strawberry topping: warm preserves with water, then pour over strawberries.
- Decorate: Pipe whipped cream around the top edge and garnish with whole strawberries.
Notes
- Make sure all ingredients are at room temperature for the smoothest cheesecake.
- Chill assembled cake for at least 2 hours before slicing.
- You can swap fresh strawberries for frozen (thawed) in the topping.
- Cheesecake and cake layers can be made 1 day in advance.
- Use a serrated knife to cut clean slices.
- Prep Time: 30 minutes
- Cook Time: 1 hour 10 minutes
- Category: Dessert
- Method: Baking
- Cuisine: American
Nutrition
- Serving Size: 1 slice
- Calories: 540
- Sugar: 38g
- Sodium: 380mg
- Fat: 31g
- Saturated Fat: 19g
- Unsaturated Fat: 10g
- Trans Fat: 0g
- Carbohydrates: 58g
- Fiber: 1g
- Protein: 7g
- Cholesterol: 130mg