Let’s be honest dessert in a jar just hits different. It’s got that homemade charm, the grab-and-go convenience, and a Pinterest-worthy vibe that makes you feel like a kitchen boss. Did you know jar desserts have spiked in popularity over the last few years? According to Google Trends, searches for “desserts in a jar” have been steadily rising people are clearly loving the combo of easy and cute.

That’s exactly what makes Key Lime Pie Jars a must-try. They pack all the zesty, creamy goodness of the classic pie into a mini, no-bake format that’s practically made for parties, gifts, or late-night fridge raids (we’ve all been there). I first made these for a summer BBQ, and now I’m asked to bring them to every gathering. They’re fresh, tangy, and just sweet enough to keep you coming back for another spoonful.
If you loved these Key Lime Pie Jars, don’t miss some of our other standout recipes! For a refreshing boost, try our Chia Seed Water Recipe it’s as easy as it is energizing. If you’re in the mood for something chocolatey, our Chocolate Crinkle Cookies are a fudgy, crackly favorite. And if you’re baking ahead for breakfast, our moist Pumpkin Banana Loaf is a must-try. Looking for high-protein options? These Protein Burger Buns level up any sandwich. Or turn up the heat with our Fiery Chicken Ramen with Creamy Garlic Sauce it’s bold, spicy, and full of flavor.
Curious about the health perks of limes beyond dessert? Healthline breaks it down with all the science-backed benefits of this zesty fruit from vitamin C to antioxidants.
What Makes Key Lime Pie Jars So Popular?
Alright, let me tell you these little jars are way more than just a pretty face. First off, they’re crazy convenient. You don’t need to fuss with slicing a messy pie or hoping it sets just right. You just layer, chill, and go. Each jar is its own little world of flavor.
Another big win? Portion control. If you’re like me and can’t be trusted around a full pie, these jars help keep things in check (until you eat two, but hey no judgment here). Plus, they’re a total crowd-pleaser. I’ve brought these to birthday parties, baby showers, and even a friend’s bridal brunch they disappear fast.
And let’s not skip the obvious presentation matters. These jars look impressive with literally zero effort. Add a slice of lime or a swirl of whipped cream on top? Chef’s kiss. People will think you spent hours, when really, you threw them together during an episode of your favorite show.
I swear, once you try them, you’ll keep jars stocked just in case the dessert mood strikes which, in my house, is basically every day.
Ingredients You’ll Need
Let’s break it down this is everything you need to whip up these tangy little beauties:
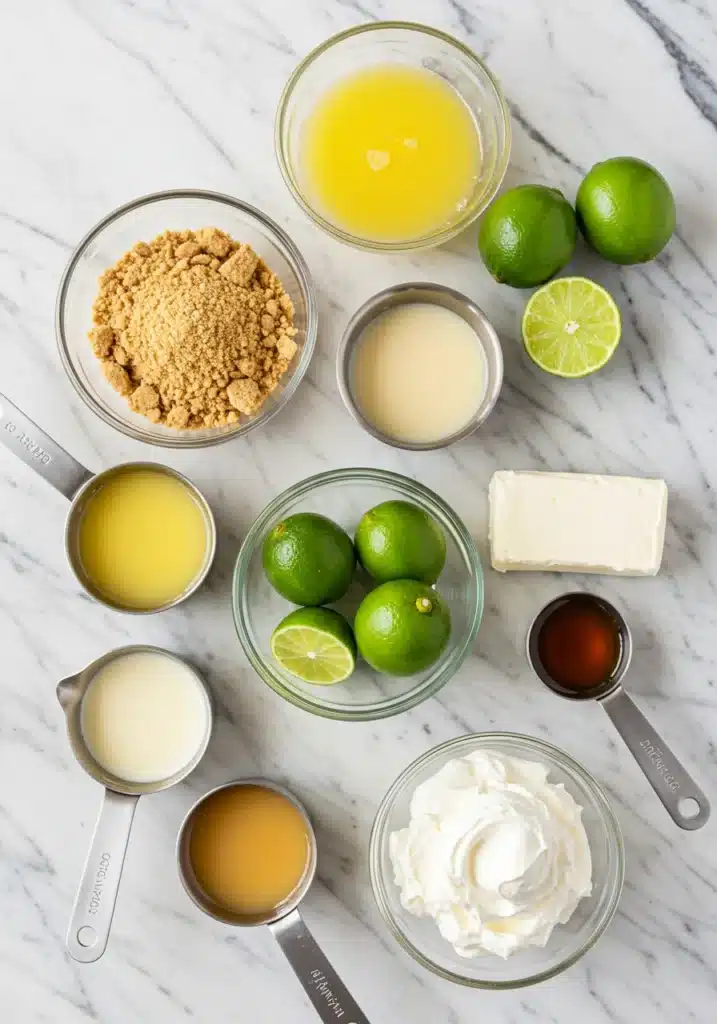
For the Crust:
- 1 ½ cups graham cracker crumbs (about 10 full crackers)
- 4 tablespoons melted butter
- 2 tablespoons brown sugar (optional, but adds depth)
For the Filling:
- 1 can (14 oz) sweetened condensed milk
- ½ cup fresh key lime juice (bottled works too if you’re in a pinch)
- 8 oz cream cheese, softened
- Zest of 2 limes
For the Topping:
- Whipped cream (store-bought or homemade)
- Extra lime zest or thin lime slices for garnish
Tools:
- 6–8 small mason jars (4 oz or 6 oz)
- Electric mixer (or major whisking energy)
Step-by-Step Instructions for Assembling Key Lime Pie Jars
Alright, now let’s get into the good stuff. It’s so easy, you’ll be like… why haven’t I done this before?
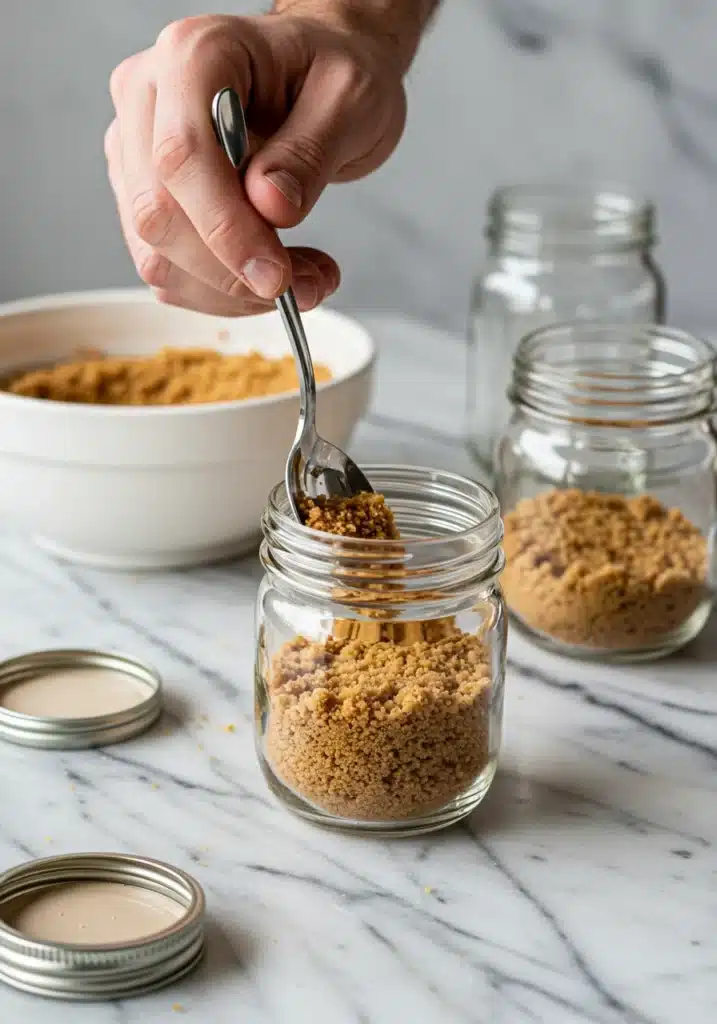
1. Make the Crust
Crush up your graham crackers in a food processor or zip-top bag with a rolling pin. Mix with melted butter and brown sugar until it’s the texture of wet sand. Spoon a layer into the bottom of each jar and press it down gently. No need to bake this is a no-bake zone.
Pro tip: If you like a firmer crust, pop the jars in the fridge for 10–15 minutes to let the butter set.
2. Mix the Filling
In a bowl, beat the cream cheese until smooth. Seriously take your time here. Add the sweetened condensed milk, lime juice, and lime zest, then beat everything together until it’s silky and creamy. Don’t rush this step lumps are the enemy, and once they’re in there, they’re not going anywhere.
I learned this the hard way when I rushed through it once and ended up with a weirdly chunky filling that just wouldn’t set right. Not cute. Trust me, room temperature cream cheese is the move. And if you ever find your filling too runny or just not holding up, here’s how to firm up cream cheese filling without ruining the texture. Lifesaver.
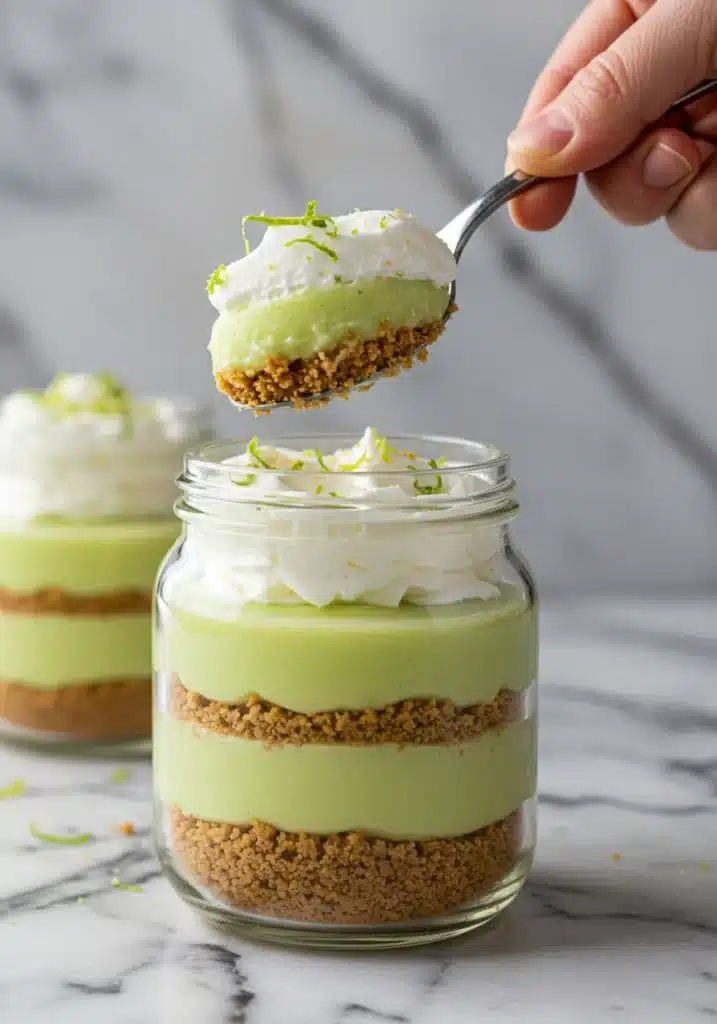
3. Layer It Up
Spoon the creamy lime filling over the crust in each jar. You can go rustic and leave it swoopy or smooth it out with the back of a spoon. Chill the jars in the fridge for at least 2 hours, or until firm.
Bonus: They actually taste better the next day when all the flavors meld together.
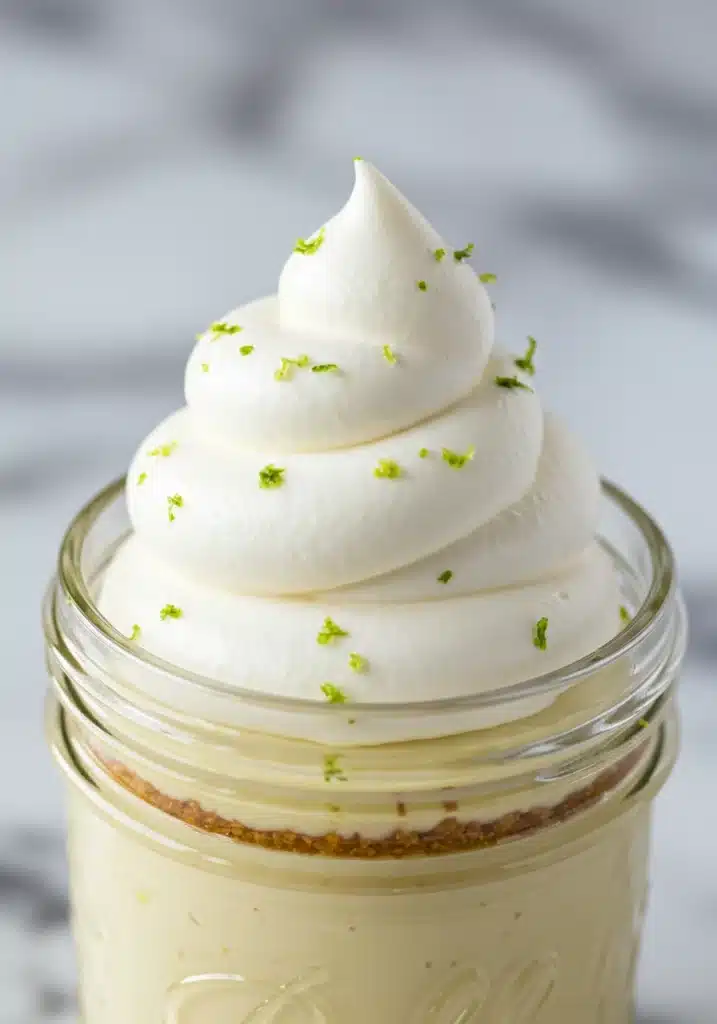
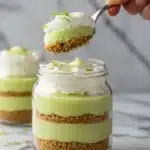
4. Add the Topping
Right before serving, top each jar with whipped cream and a little lime zest or slice for flair. It’s totally optional but it makes them look like they came from a fancy bakery.
And that’s it! You just made Key Lime Pie Jars like a pro.
Common Mistakes to Avoid When Making Key Lime Pie Jars
Okay, real talk. I’ve made these more times than I can count, and yeah, I’ve definitely messed them up a few times. So let’s skip the learning curve and jump straight to not screwing it up.
1. Using Cold Cream Cheese
Don’t do it. Seriously. I’ve been lazy before and tossed it in straight from the fridge and what I got was a lumpy mess that wouldn’t mix properly. Let it sit out for at least 30 minutes so it’s nice and soft.
2. Too Much Lime Juice
Key limes are tart little devils. If you go overboard with the juice, your filling won’t set and it’ll taste more sour than sweet. Stick to the recipe, even if you’re tempted to go all in on that citrus zing.
3. Skipping the Chill Time
I get it. You want dessert now. But this filling needs time to firm up. Don’t try to serve them right after mixing they’ll just be gooey soup in a jar. I learned that the hard way at a summer BBQ. So yeah, chill for at least 2 hours, overnight is even better.
4. Not Tasting as You Go
The filling is safe to eat raw, so taste it! Adjust the lime or zest if you need to. I once forgot the zest completely blandest pie jars ever. Never again.
Fun Variations to Try with Key Lime Pie Jars
Want to mix things up a bit? These jars are super forgiving and easy to customize. Here are a few spins I’ve tried (and loved):
1. Coconut Key Lime Pie Jars
Swap out part of the graham crackers for crushed coconut cookies or toss in some shredded coconut with the crust. Adds a tropical flair that’s chef’s kiss.
2. Strawberry Swirl
Layer in a little strawberry jam or fresh macerated berries between the crust and filling. Kinda like a key lime shortcake, and it looks amazing.
3. Chocolate Graham Crust
Try using chocolate graham crackers instead of regular. Adds a rich twist that balances the tart lime flavor perfectly.
4. Mini Meringue Top
Okay, this one’s a little extra but if you’ve got a kitchen torch, pipe on some meringue and give it a light toast. It’s basically a lemon meringue pie’s cousin, and people love it.
How to Store and Transport Key Lime Pie Jars
One of the best things about key lime pie jars? They’re basically made for storing and taking on the go. But there are still a few tricks to keeping them fresh and intact.
Storing at Home
Pop the jars into the fridge right after assembling. Make sure they’re tightly sealed with a lid or some plastic wrap. They’ll stay fresh for about 4–5 days. Honestly, I like them even better on day two the flavors get extra cozy together.
If you’re prepping ahead, keep the crust separate and layer it just before serving to avoid sogginess. Been there, done that, regretted it.
Freezing Tips
Yes, you can freeze these! Just skip the whipped cream topping until after thawing. Freeze in airtight jars or containers (preferably freezer-safe glass). They’ll keep for about a month. Thaw overnight in the fridge for best texture.
Taking Them on the Go
Use sturdy glass jars with secure lids. Mason jars are perfect. Pack them upright in a cooler bag with an ice pack if it’s a warm day. I’ve brought them to picnics, road trips you name it. They travel like a dream.
FAQs About Key Lime Pie Jars
1. Can I use regular limes instead of key limes?
Yes! While key limes are slightly sweeter and more aromatic, regular limes work perfectly fine in this recipe. I’ve made the swap a few times and no one could tell the difference.
2. Can I make this recipe ahead of time?
Absolutely. These pie jars are great for prepping in advance. You can make them up to two days ahead—just keep them covered and refrigerated until serving.
3. How do I make them less tart?
To mellow out the tartness, reduce the amount of lime juice and zest slightly. You can also increase the sweetened condensed milk a bit to balance the flavor. Always taste the filling before chilling to adjust it to your liking.
4. What’s the best kind of jar to use?
4-ounce mason jars are ideal for this recipe. They’re the perfect portion size, seal well, and are easy to transport. Plus, they make for a beautiful presentation!
Why Everyone’s Obsessed with Key Lime Pie Jars
- Total Time: 2 hours 15 minutes
- Yield: 4 jars 1x
Description
These Key Lime Pie Jars are a no-bake, refreshingly tart dessert with a buttery graham cracker crust, creamy citrus filling, and fluffy whipped topping. Perfect for summer parties or make-ahead treats in individual servings!
Ingredients
Crust:
- 1 cup graham cracker crumbs
- 2 tbsp granulated sugar
- 4 tbsp unsalted butter, melted
Filling:
- 1 (14 oz) can sweetened condensed milk
- ½ cup key lime juice (fresh or bottled)
- Zest of 2 limes
- ½ cup sour cream
Topping:
- 1 cup heavy whipping cream
- 2 tbsp powdered sugar
- Lime slices or zest (for garnish)
Instructions
- Prepare the crust: In a mixing bowl, combine graham cracker crumbs, sugar, and melted butter. Stir until fully combined.
- Assemble base layer: Divide crust mixture between 4 small jars (2–3 tbsp each). Press down firmly to create a base.
- Make the filling: In a bowl, whisk together sweetened condensed milk, key lime juice, lime zest, and sour cream until smooth and creamy.
- Layer the filling: Spoon the filling evenly into the jars over the crust.
- Chill: Cover jars and refrigerate for at least 2 hours (or overnight) until the filling is set.
- Whip the topping: Beat heavy cream and powdered sugar together until stiff peaks form.
- Garnish & serve: Pipe or spoon whipped cream onto each jar and top with lime zest or a slice. Serve chilled.
Notes
- Bottled key lime juice works fine if fresh key limes are unavailable.
- You can prep these a day in advance just add the whipped topping before serving
- Prep Time: 15 minutes
- Category: Dessert
- Method: No-bake
- Cuisine: American
Nutrition
- Serving Size: 1 jar
- Calories: 420
- Sugar: 32g
- Sodium: 170mg
- Fat: 24g
- Saturated Fat: 14g
- Unsaturated Fat: 9g
- Trans Fat: 0g
- Carbohydrates: 46g
- Fiber: 1g
- Protein: 6g
- Cholesterol: 65mg